Photo-editing Tutorial
What is this tutorial exercise all about?
This tutorial is a simple editing exercise to illustrate the use of the photo-editing oriented tools. It is meant to familiarize the user with the basics of photo-editing and the use of layers and paths.
Before you begin...
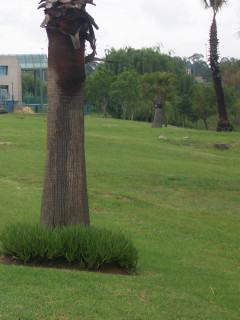
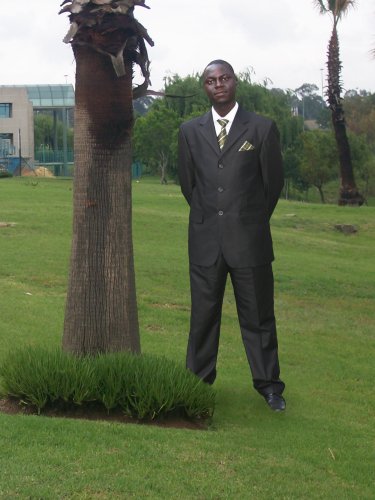
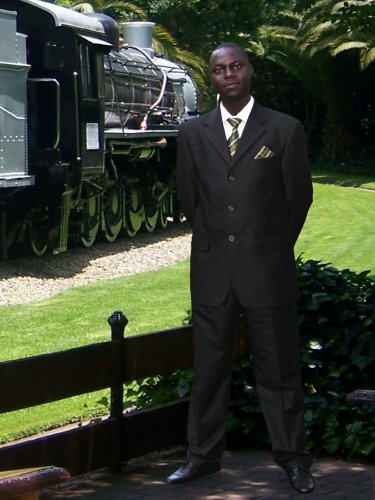
Before we can start putting together our masterpiece, we need to find a set of images to work with. We also need to decide what we want to do with them. For this tutorial, I have elected to use a photo of myself and a few backgrounds. I'll cut myself out of one photo and place the cut out in the others, working to make the result look as realistic as possible. The goal of this exercise is to fool the eye; so much so that a third party who sees the final work will not be able to tell it’s a fake.
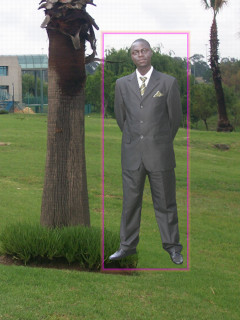
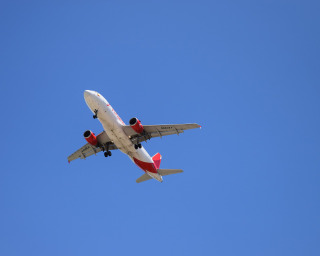
Basically, this is what we have:
 |
 |
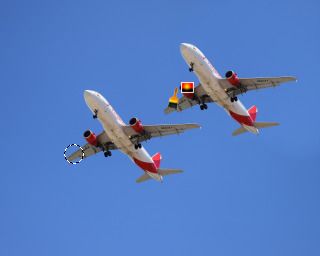
And this is what we want to create:
 |
 |
Looks hard, doesn’t it? It’s actually very easy, as you’ll see.
To load the images, drag-drop each image onto Chasys Photo Editor and choose Yes when asked whether to import as layers. Alternatively, you can use File > Open to load the background, then use Layers > Import from File for each extra image.
Next, you need to prepare the images for use. To do this, you’ll need to perform some balancing of things like color, light, contrast, etc, but we won't get into that right now. You also need to make sure the images are of the correct size, which is to say neither too large nor too small. Larger images are easier to cut out and give better results but also consume more RAM and are more difficult to manipulate, so it’s sort of a balancing act.
If the images were captured using a digital camera, you’ll probably need to crop and rotate them to compensate for too large a field of vision and camera orientation, respectively.
Both processes can be done at once using the Crop ![]() tool:
tool:

The cropping tool has three handles that the user can manipulate. The first handle (centered) adjusts the center of the cropped image. The second and third adjust the width and height respectively, and either can adjust the rotation angle.
Lest You Forget...
Do you remember this line in the license agreement? "The author will bear no responsibility for any inappropriate, defamatory or illegal works created using this software..." It applies here. If you draw something funny and it gets you in trouble, you are on your own.
Cutting out...
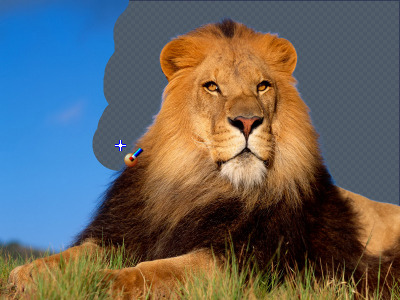
Before we do anything else, we need to separate the subject from the rest of the source image.
In other words, I need to cut myself out of this photo.
For this tutorial, we will be doing this using the Pen and Path tool ![]() .
This tool allows you to select an area of any shape using computer-generated curves.
Select the Pen and Path tool, then choose the first option.
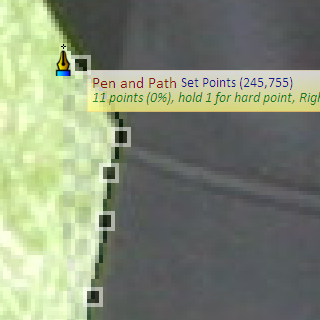
Starting from a relatively flat area in the photo, we set points (left-click) cutting around the subject as carefully as we can.
This is usually easier to do with a larger image, so if the source is from a relatively small image, resizing it will do you a lot of good:
.
This tool allows you to select an area of any shape using computer-generated curves.
Select the Pen and Path tool, then choose the first option.
Starting from a relatively flat area in the photo, we set points (left-click) cutting around the subject as carefully as we can.
This is usually easier to do with a larger image, so if the source is from a relatively small image, resizing it will do you a lot of good:
 |
 |
Some users may find trouble doing this. Remember, we are using curves; left-click to set points and right-click to end the selection. You may find it easier to cut when the image is zoom to 200% or 400% (remember to turn off the Smooth Image When Zoomed option under the View menu so you can see the pixels).
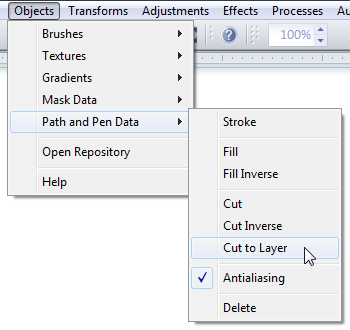
Once you are done, go to the menu, and select the Cut to Layer option as shown above. You'll be left with a floating cut-out like the one illustrated below.
 |
|
This cut-out can now be pasted onto any background of our choice.
 |
Chasys Photo provides easier ways of doing this, including the Background option of the Eraser Tool
|
Moving elsewhere...
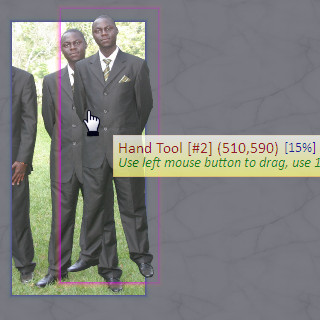
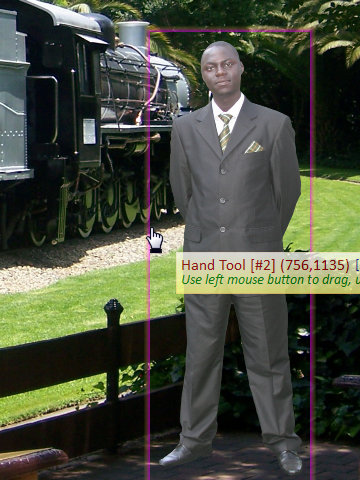
Now we introduce our target images. Using a new window of Chasys Photo, open the first background image. Copy the cut-out from the first window and paste it here:
|
 |
The first problem we have is quite obvious - lighting. The source image was slightly over-exposed, making the subject very bright. Put against this background, the subject stands out. We can correct this by adjusting the curves of the cutout:
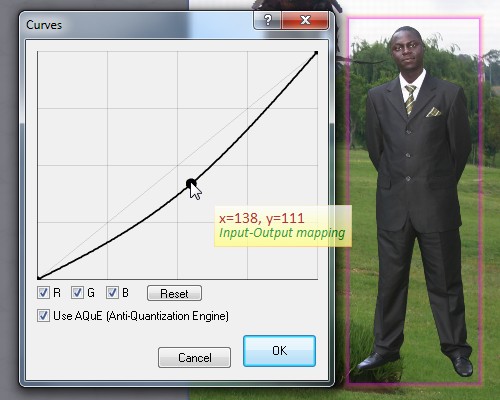 |
What I basically did here was to make the image darker, to match the relatively dark background (note the color of the suit). In photographic terms, we can say I reduced the image’s exposure. If you want to do this in a non-destructive way, you can do so by using an adjustment layer – just right-click the layer, select Adjustments, then select Attach Adjustment Layer. In the adjustment layer properties window, select Curves then adjust.
Telling lies...
Let’s take another look at what we have so far. This picture has several obvious blemishes – we seem to be floating, have no shadow and are overlying a bush we should be behind of:
 |
 |
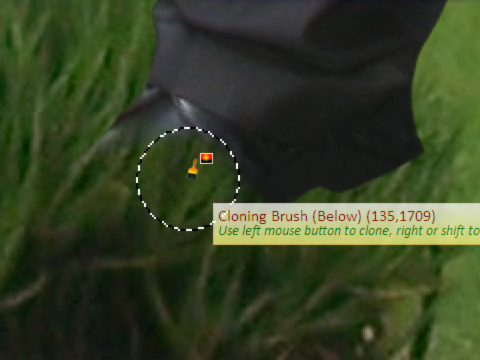
Let’s start with the bush. For this task, we will use the Cloning Brush ![]() .
The cloning brush is a photo-correction tool that copies pixels from one area of an image to another using a fixed offset.
.
The cloning brush is a photo-correction tool that copies pixels from one area of an image to another using a fixed offset.
|
|
What we want to do is to copy the bush from behind the subject’s foot to the front of the said foot. With the cutout set as the active layer, we select the clone tool and choose the second option (below). We then hold and release the right mouse button without moving it to set the reference point to the same point as the clicked point. Set this way, the clone tool will select the corresponding pixel from the layer below the one we are working with.
 |
Proceed as shown, watching out for the edges. Done properly, the final result should look something like this. Note the continuity of the bush:
 |
You may also choose to do the same with the grass covering the other foot to make the results more convincing, but this should be done after adding shadows (the next step).
A pinch of black...
If your objects don’t have shadows, they'll seem to float above the rest of the image. It is therefore very important that you add shadows, where relevant, to each object that you insert into an image. The goal of this task is to overcome the challenge of proper shadowing. Before you perform this exercise, examine the image you have to determine what kinds of shadows (if any) the objects already present in the image have.
Method #1...
There are very many ways to do shadows.
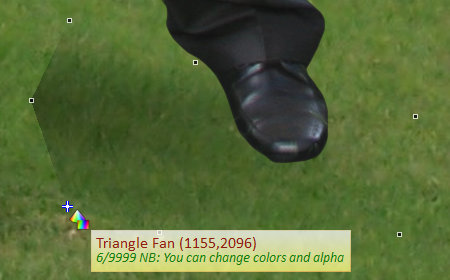
The first (and perhaps most complex) method you can use involves the Triangle List ![]() .
This tool can be used to draw accurate shadow volumes quite easily, once you get the hang of using it.
.
This tool can be used to draw accurate shadow volumes quite easily, once you get the hang of using it.
|
Triangles form the basis of all 3D graphics today, be it your 3D game or 3D modeling application. You can use triangle strips and triangle fans to specify an entire surface without having to provide all three vertices for each of the triangles. For example, only seven vertices are required to define the following triangle fan (and strip).
The graphics engine uses vertices 1, 2, and 3 to draw the first triangle; vertices 2, 4, and 3 to draw the second triangle; vertices 3, 4, and 5 to draw the third; vertices 4, 6, and 5 to draw the fourth; and so on. Notice that the vertices of the second and fourth triangles are out of order. This is required to make sure that all of the triangles are drawn in a clockwise orientation. In other words, draw in a zigzag manner, up and down along the line of reference. |

For our task, we will use black at several alpha settings. The idea is to have a lot of black where we want the shadow to be the darkest, shifting to less black and then no black. The next frame shows you the first step in this method. Using the Triangle Fan mode in black and alpha#1 set at 160, a triangle was drawn starting a point between the feet, just left of the bush. Alpha#1 was then set to 255 and as the other points clicked in turn:
 |
Proceed as shown, placing points around the central one at various distances to achieve the desired result. Right-click the first point to set a final point that is superimposed onto the first. You can then proceed to add more shading as needed (e.g. for the other foot):
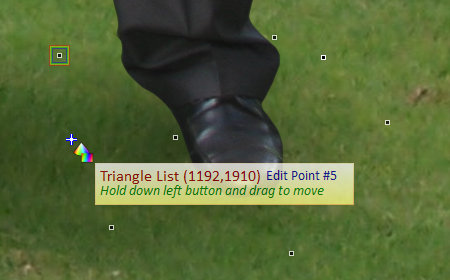 |
One more thing - shadows are cast in the direction opposite the source of the light casting the shadow. If the shadows in the image don’t point where they are supposed to, the image will look unnatural. don’t go putting shadows in the wrong direction!
Method #2...
If you find the Triangle Fan method too complex for you, you can choose to use the Smoke option (option #1) of the Effects Brush
![]() . This option is like a translucent brush of some sort - it adds just a little bit of the selected color to the area.
You can use it to draw shadows by adding a little black to the ground near a object, for example:
. This option is like a translucent brush of some sort - it adds just a little bit of the selected color to the area.
You can use it to draw shadows by adding a little black to the ground near a object, for example:
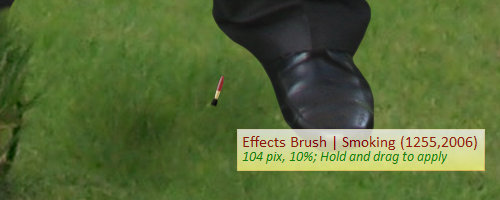 |
Just remember that the smoke effect brush is a bit sensitive, so keep its level below 10.
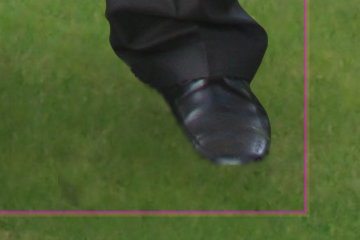
Make sure you don’t overdo it, otherwise people will notice, and you won't earn yourself a lot of respect as an image editor – image editors are known to be very keen and careful people, you know. Quick, short strokes and a low fx-Level are the key to doing this right. The shadows need to match the lighting of the scene; be it diffuse (which gives gradual, spread-out, almost undetectable shadows) or point (which gives sharp, dark shadows).
Some final touches...
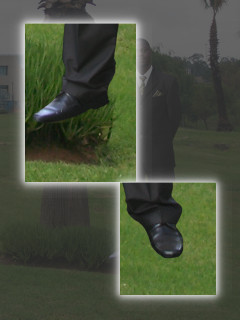
With most of the work done, we can now turn our attention to the details. The first thing that needs sorting out is the foot in the grass. The Cloning tool can come in handy here; I used it to do the grass around the shoe:
 |
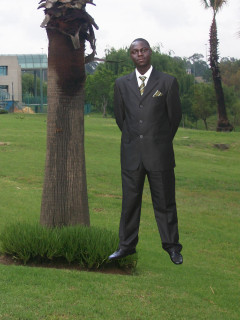
See how the shoe disappears into the grass? This is the effect we want, because this is exactly what would happen if you where actually there. Now, we have done a fair amount of drawing, and it’s only fair the we see the fruits of our labor. This is the final image:
|
Easy, wasn’t it?
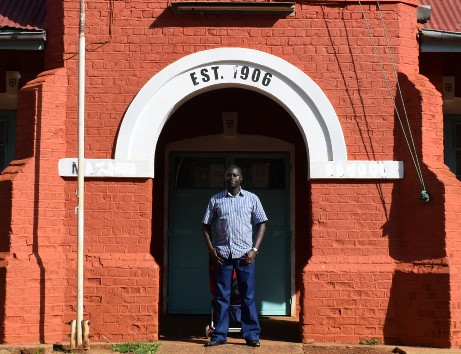
Changing things...
The beauty of editing with layers is that you can always go back and change a layer without touching anything else. If we wish to, we can always reuse our cutout with another background.
 |
As expected, the exposure is all wrong, but this can be corrected using curves or an adjustment layer as shown earlier. Luckily for us, this time there are no bushes or grass-blades to deal with. A little patching-up later, this is what we have:
|
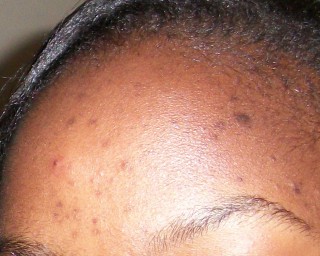
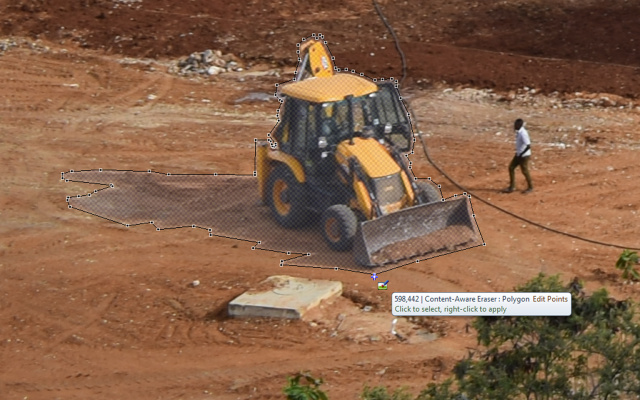
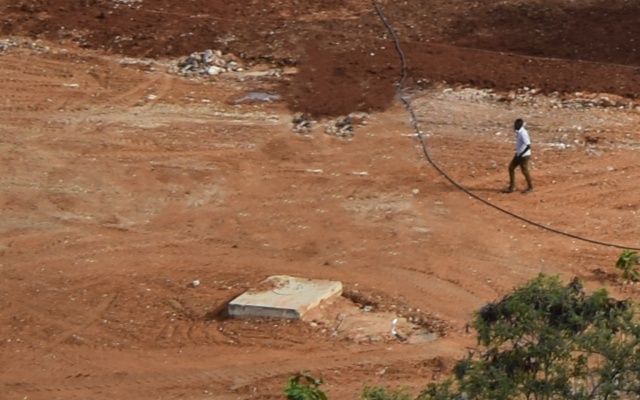
Removing things...
In this (very old) tutorial, we’ve been mostly focusing on adding things to images, byt the reverse is also possible with the new
content-aware tools and options in Chasys Photo. Of particular interest is the
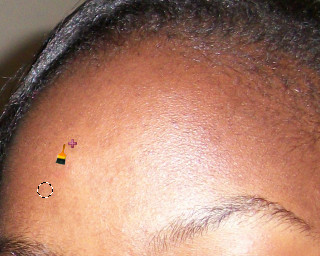
Content-Aware Eraser ![]() tool, which can be used to seamlessly
reomve unwanted objects from images:
tool, which can be used to seamlessly
reomve unwanted objects from images:
 |
 |
 |