Object Animation
What is an Object Animation?
An object animation is simply an illusion of movement created by moving layers and changing their attributes over time based on a predefined set of rules. Such rules can, for example, indicate that a layer with the image of a ball should move from the bottom of the page to the top of the page within one second. Chasys Photo will then move the “ball” along that path over the course of one second, creating an illusion of movement. Unlike the related timeline animation method implemented by other image editors, object animation in Chasys Photo is completely frame-less, although the results can be converted to a frame animation. For that reason, object animations do not have a frame-rate. Each object that needs to be animated is represented by one free-style layer.
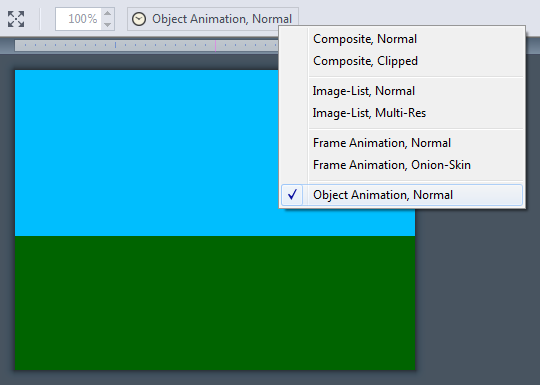
Before Chasys Photo Editor can animate the layers for you, you need to inform it that the image you are working on is an object animation. You do this by setting the image-mode to object animation. You can find this option under the image menu.
Next, you need to define the animation behaviour of each layer that will move or change as the animation progresses. You do this using the “Animation Timeline” window shown below. The details of doing that will be covered in the tutorial exercise below.

Animating Objects (exercise)
For this exercise, we will create a simple background, a ball and its shadow as three separate layers. We will then use the Object Animation functionality to define the movement of the ball and its shadow, as well as the visibility of the said shadow, to create a realistic animation of a bouncing ball.
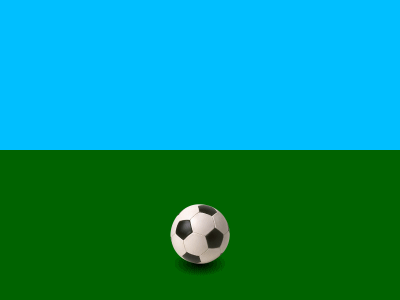
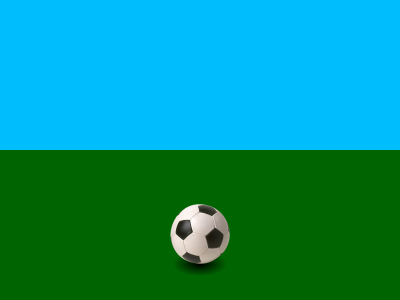
Start a new blank project and set the size to 800 by 600 pixels. Draw a simple background with a blue sky and green ground, then set the image mode to Object Animation as shown below.
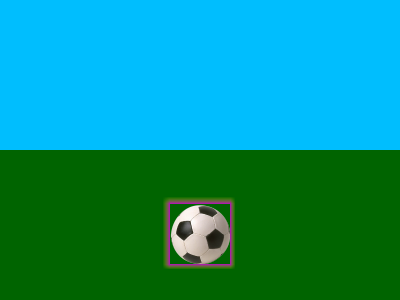
Add an object (such as a ball) to the background and position it as desired.
Add a new layer of the same size as the ball. Make the background of that layer transparent and use the GT Shape tool ![]() in ellipse mode to draw a
black elliptical shadow on that layer.
in ellipse mode to draw a
black elliptical shadow on that layer.
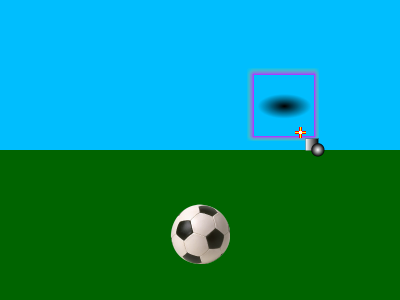
Move and change the z-order of the new shadow layer so that the shadow is positioned behind the ball. Hint: Use the blue arrows in the Layers window to change z-order.
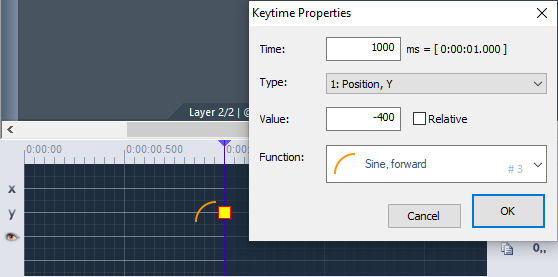
You are now ready to animate. Highlight the ball by selecting it with the Hand tool. You should have the Animation Timeline window open, if you don’t, choose it from the Window menu. On the timeline, move the blue time slider to 00:01.000 (1 second or 1000 milliseconds) while holding the Shift button so that it snaps to the axis instead of moving smoothly. There’s a line marked “Y” on the timeline, and to the right of that There’s a “+” sign; that’s the “Add Y” button. Click that button. The “Time” should read “1000 ms” and “Type” should read “Position, Y”. Set “Value” to “-400” so that the ball goes up and “Function” to “Sine, forward” because bouncing balls don’t go up linearly. Click “OK”. A new entry will be added to the timeline; such an entry is called a keytime.
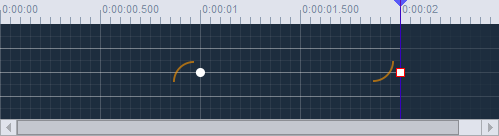
Look at the preview window. It should show the ball going up but reappearing at the bottom as if by magic. That’s because we haven't defined the path it should take on the way down. To do that, create a new keytime by moving the time slider to 00:02 and repeating the process above. Use the following values: Time = “2000 ms”, Type = “Position, Y”, Value = “0”, and Function = “Sine, reverse”. Note that the sine is reverse, not forward. Clicking OK will yield a timeline that looks like this:
Look at the preview window again. You now have a ball that is bouncing properly, but the shadow is static. Given the direction of the light, the shadow should fade out and move to the right and back as the ball rises, so our animation is not realistic. We need to fix that.

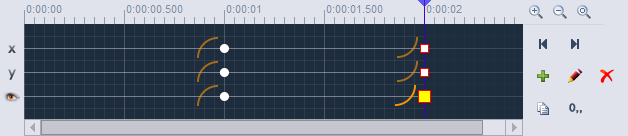
Select the layer with the shadow using the Hand tool to make it the active layer. The timeline should go blank because that layer has no animation information defined yet. We will now add animation to it by defining keytimes. Since the movement of the shadow is more complex, we need more keytimes for it: two for “X”, two for “Y” and two for the eye symbol, which represents transparency, for a total of six keytimes. Create them as per the table below:
| Step | Time | Type | Value | Function | Explanation |
|---|---|---|---|---|---|
| #1 | 1000 ms (00:01.000) | Position, X | 300 | Sine, forward | Move 300 pixels to the right |
| #2 | 2000 ms (00:02.000) | Position, X | 0 | Sine, reverse | Move back to the initial position |
| #3 | 1000 ms (00:01.000) | Position, Y | -80 | Sine, forward | Move 80 pixels up |
| #4 | 2000 ms (00:02.000) | Position, Y | 0 | Sine, reverse | Move back to the initial position |
| #5 | 1000 ms (00:01.000) | Transparency | 240 | Sine, forward | Change transparency to 240 (94% transparent) |
| #6 | 2000 ms (00:02.000) | Transparency | 0 | Sine, reverse | Restore transparency to 0 (fully opaque) |
Your timeline should look like this after you've created all the six keytimes listed above:
The resulting animation is shown below. You can save it as a .CD5 file, or, additionally, you can render it to a frame animation so that you can export it as a GIF animation or an AVI video. To do that, just select “Render Object Animation” from the Animation menu in the main window then save the result as a .GIF file. You can also render it directly to a video file using the “Animation Renderer” device plug-in by going to the “File” menu then selecting “Send to Device”.