All the graphics in this help file were created using Chasys Photo Editor
If you like the software, please tell a friend ... or two
Thank you for choosing Chasys Photo! It’s been said that once you go Chasys you’ll never go back. Chasys Photo
takes a radically different approach to image editing, which I believe results in a better editing experience for both new and experienced artists.
When developing this software, I adhered to four ideals, which I’ve christened the four pillars of Chasys Photo:
Character (no photoshop imitations here), Performance (fast, efficient and stable),
Innovation (new techniques and out-of-the-box thinking) and Cleanliness (clean code devoid of bloatware).
It is my hope that you’ll find it useful and that you’ll enjoy using it. Thank you!
“unique, flexible and powerful”
The suite is made up of three primary applications, with several support applications in the background.
These three primary applications are listed below; please click the icons or titles for more information.
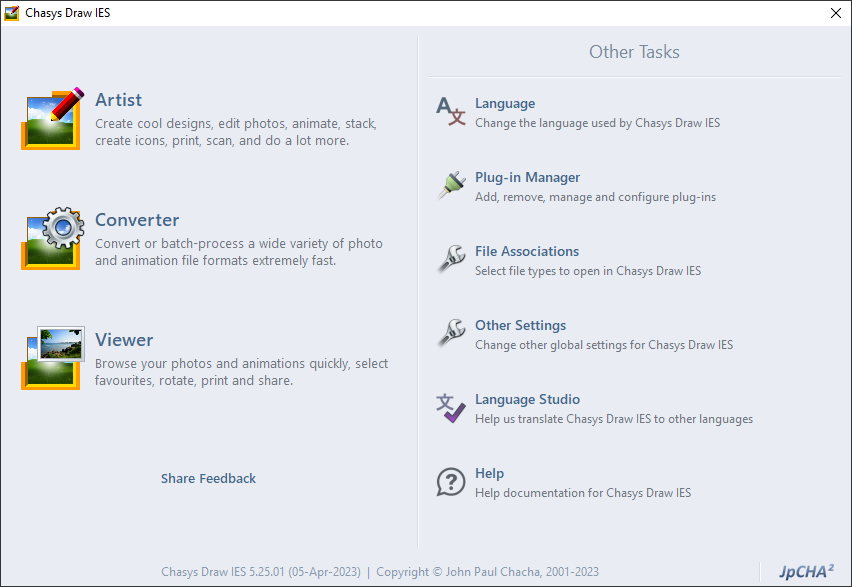
In a typical configuration, the window above, called the Chasys Photo Lobby, is the first screen that is shown when you start Chasys Photo.
From here, you can start one of the three aforementioned application or choose from a list of other common tasks. You may also drag-drop files and folders onto the application icons to open them.
This is a full-fledged image editor with free-style layer support and many other cool features.
With Chasys Photo Editor, you can easily create cool designs, edit photos, animate, create icons, print, scan, and do a lot more.
This is an image viewer and browser that’s been optimized for maximum speed.
It allows you to go through your pictures quickly and offers you a variety of features such as selecting and managing favourites and rotation for both stills and animations.
This is a cross-converter for image files with a highly parallel multi-process architecture.
This converter was specifically designed to take advantage of multi-core processors up to 128 cores.
On such processors, the speed of conversion scales up with every additional core.