Brush objects, or custom brushes, are image-based resources used by tools such as the
Brush and Effects Brush to control the shape and behavior of the “tip” of the “brush”. They are
implemented as static or animated layered images with MARKmetadata containing the brush.* family of mark-up tags. Brushes are shared resources that can be exported to and imported from a file.
Custom Brush functionality is currently enabled through Brush Engine, which supports Chasys Photo brushes (.cd5), Adobe brushes (.abr) GIMP brushes (.gbr/.gih), Jasc Paintshop Brushes (.jbr) and PaintShop Pro Brushes (.PspBrush/.PspTube). Chasys Photo comes with a few custome brushes pre-installed, but you can always add your own. You can download brushes from various websites on the internet; just use your favourite search engine to search for them.
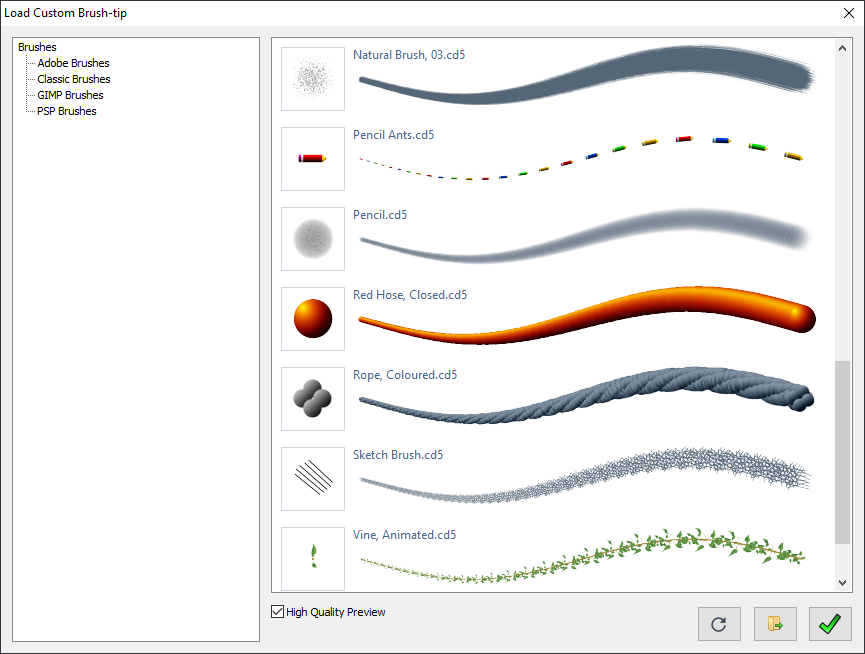
To load a custom brush tip, just left-click the “current brush” gadget (shown on the left); alternatively, you can select Menu > Objects > Brushes > Load from File. Doing this will open up the “Load Custom Brush-tip” window where you can preview brushes and select one to use. The preview consists of an image of the tip shape and a curve drawn using that tip with varying pressure (Chasys Photo supports pen tablets and custom brushes can change their apperance based on pen pressure and rotation).
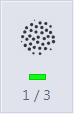
The presence of a brush object is indicated by the “current brush” gadget showing the shape of the brush tip and basic information about the brush. For some brushes, the tip may be animated. You can right-click the gadget to bring up the “Brush Options” window where you can configure the brush, save it, discard it or load another brush. This window allows you to configure each brush-tip element separately, giving you a lot of control over brush behaviour. Left-clicking will allow you to replace the brush with another one.
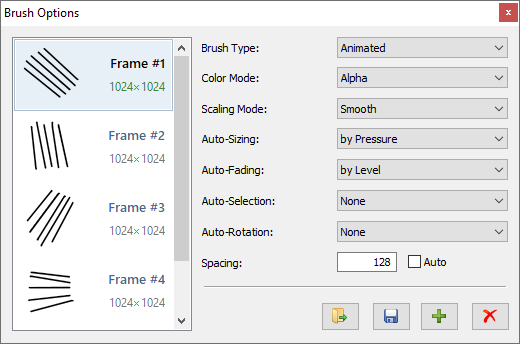
The Brush Options window allows you to select the active brush tip for static brushes. Additionally, provides the advanced options listed below. Normally, you will not need to change these; however, the options exist if you need them.
Brush Type
This option defines whether a brush is Static or Animated. A static brush uses one tip for each stroke drawn, while an animated brush continously changes tips.
Color Mode
This option sets the color mode of the selected brush tip. Four modes are supported – Color, Alpha, Mono and Luma. Color means the tip is alpha-blended into the image as is. Alpha means that only the alpha channel is used; the color set by the user is used for the operation. Mono is similar to alpha, except that the luminance of the tip is interpreted as its alpha channel, while luma combines the luminance of the brush with the chrominance of the current color.
Scaling Mode
This option sets the scaling mode of the selected brush tip. Two modes are supported – Smooth and Rough. This parameter basically controls where or not a smooth stretching operation is performed.
Auto-Sizing
This option sets the auto-sizing mode of the selected brush tip. This determines if, and how, the brush tip will be resized as you draw. Two modes are supported – None and by Pressure. When this is set to “by pressure”, the tip size will change with the pressure you apply to your graphics pen as you draw.
Auto-Fading
This option sets the auto-fading mode of the selected brush tip. This determines if, and how, the brush tip will be faded (adjustment of visibility) as you draw. Four modes are supported – None, by Level, by Pressure, Linear and by Pressure, Non-Linear. When this is set to one of the “by pressure” modes, the tip visibility will change with the pressure you apply to your graphics pen as you draw.
Auto-Selection
This option sets the auto-selection mode of a custom brush. Two modes are supported – None and by Width. When this is set to “by width” in a static brush, the brush tip image is selected based on the width setting in the toolbox, effectively making it possible to define the tip at different sizes and automatically switch between these definitions.
Auto-Rotation
This option sets the auto-rotation mode of a custom brush. Three modes are supported – None, by Vector and by User Input. In “vector” mode, the tip of the brush rotates to align with the direction of drawing. When set to “user input”, it relies on the user to provide direction, either through the toolbox “level” setting or via graphics pen rotation if supported (e.g. Wacom Intuos with 6D Art Pen).
Spacing
This option sets the spacing attribute of the selected brush tip. The spacing is the distance between any two applications of the tip. Auto (or “0”) means the distance is automatically determined by Chasys Photo Editor based on the “level” setting on the toolbox, 1 means the tip is continuous/joined, and any other value indicates the spacing in pixels. Negative values are not allowed.
To go back to using the default (solid round) brush-tip after loading a custom brush-tip, simply bring up the Brush Options window then select “Discard” to get rid of the custom brush.
Using Brush Objects
See the sections on the Brush Tool and the Effects Brush Tool for information on how to use brush objects in your drawings.
Installing Brush Objects
To install brushes, you need to copy the brush files to the Brushes
folder in your Chasys Photo resources folder. The files may be placed inside a sub-folder (this is highly recommended for organization is you have many brushes installed). You can find this folder by either selecting
Open Repository from the Objects menu or by clicking the “Browse” button on the “Load Custom Brush-tip” window.
Each folder or sub-folder should have no more than 256 brushes. If you have more than 256 brushes, organize them into sub-folders with relevant names.
Creating Brush Objects
To create a brush object you need to create a new image of type Image List (for static brushes) or frame animation (for animated brushes). You should then proceed to create the images that make up the brush in question. Finally, you need to add the mark-up attachment that will describe the behavior of the brush. Within this mark-up, you’ll need to define the brush properties in the form brush.property=value; using the following values:
brush.spacing=x;
This tag is used to control the spacing attribute of a custom brush. The range of allowed values are 0 - 65536. Negative values are not allowed.
brush.color_mode=mode;
This tag is used to define the color mode of a custom brush. Four modes are supported – color, alpha, mono and luma.
brush.auto_size=mode;
This tag is used to define the auto-sizing mode of a custom brush. Two modes are supported – none and pressure.
brush.auto_fade=mode;
This tag is used to define the auto-fading mode of a custom brush. Four modes are supported – none, level, pressure, linear and pressure, non-linear.
brush.scale_mode=mode;
This tag is used to define the scaling mode of a custom brush. Two modes are supported – smooth and rough.
brush.auto_select=mode;
This tag is used to define the auto-selection mode of a custom brush. Two modes are supported – none and width.
brush.auto_rotate=mode;
This tag is used to define the auto-rotation mode of a custom brush. Three modes are supported – none, vector and user_input.
brush.timer=time;
This tag is used to define the timer reference for animated brushes with repeated frames. Unlike the other tags, this tag cannot be changed via the Brush Option window.
Brush objects can be saved to files, which are then stored in the brushes folder. Chasys Photo comes with a number of predefined brushes, but you can always add your own.

 To load a custom brush tip, just left-click the “current brush” gadget (shown on the left); alternatively, you can select Menu > Objects > Brushes > Load from File. Doing this will open up the “Load Custom Brush-tip” window where you can preview brushes and select one to use. The preview consists of an image of the tip shape and a curve drawn using that tip with varying pressure (Chasys Photo supports pen tablets and custom brushes can change their apperance based on pen pressure and rotation).