Frame Animation
What is a Frame Animation?
A frame animation is simply a set of images drawn one after the other to give the illusion of movement. It is analogous to the way an artist can draw a slightly different figure on each page of a pad of paper so that when you flip between sheets rapidly, the drawing appears to move. Each of these images is called a frame. In Chasys Photo Editor, each frame is represented by one free-style layer. Chasys Photo Editor animates the layers/frames, using the frame-delay attribute of each layer to determine how long each frame is to remain on the screen before the next frame is displayed. Frames that are marked as hidden will be skipped.
 |
 |
Gives |  |
NB: I think someone owns the copyright to this cartoon character. If so, copyright, them.
Before Chasys Photo Editor can animate the layers for you, you need to inform it that the image you are working on is a frame animation. You do this by setting the image-mode to frame animation. You can find this option under the image menu.
Next, you need to set the frame delays. You can set all of them to one figure using the set global frame delay menu option under the animation menu.
Animation by Stepwise Composition (exercise)
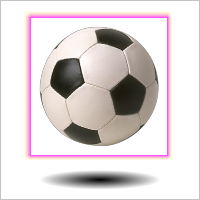
For this exercise, we will create a simple background and a ball as two separate layers. We will use these two to generate four frames which we will then animate:
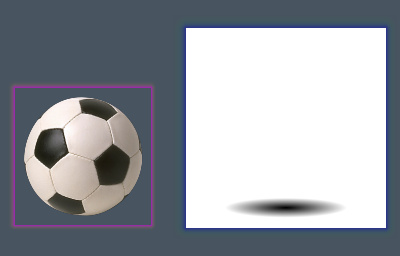
Place the ball on the “ground” as shown below. This will be the first frame in the animation. Make sure the image mode is composite.
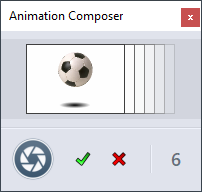
Go to the Animation menu and select Add Frame from the Animation Composer (alternatively, you can just press F9 on the keyboard). The first frame will be captured and added to the new animation in the background. An icon will appear on the upper left corner of the workspace to indicate that an animation sequence is being composed; the Animation Composer window shown below will be also displayed.
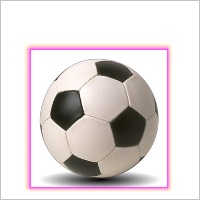
Now, go back to your image and, using either the Hand tool or the Layer Properties window, move the ball up a bit as shown below such that it is floating just above the ground. Press F9 or click the capture button in the Animation Composer to add this as the next frame in your animation. The display in the Animation Composer will change to show that you now have 2 frames captured.
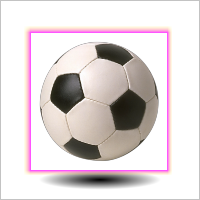
Move the ball again and repeat the process to create your third frame by pressing F9 or clicking the capture button:
We are now done composing frames, so go to the Engines menu and select Render animation sequence from the Animation Composer. You may be asked to specify a global frame delay; set this to 100 milliseconds. Duplicate the second frame to create the fourth frame (remember to move it to the top of the layer stack by right-clicking it with the Hand tool then selecting z-Order then Raise to Top from the pop-up menu):
If the preview window is not showing, go to the window menu and enable it. The preview window should now show a bouncing ball:

You can fine-tune the animation by setting the individual frame delays; for example, I used 50 for the first frame, and 80 for the second and fourth, and 100 for the third. You can also add more frames, and make fine adjustments such as making the shadow size change.

Animation by Onion-skinning (exercise)
For this exercise, we will create an animation using the so-called “onion-skinning” method of animation. This technique involves making frames translucent and projecting them on top of each other to mimic the method used in traditional cartoon animation, where the individual frames of a movie were initially drawn on thin onionskin paper over a light source. Doing so allowed the animators to draw new frames using the old ones as references, thereby making it easy to achieve smooth transition between the frames in the final video.
Start by creating a blank, single-layer image like the one below. Use a white opaque background for it. Change the image mode to animation / onion-skin. This mode must be selected for onion-skinning to work.

Draw anything – a circle, for example – on the layer. This is the object we are going to animate.

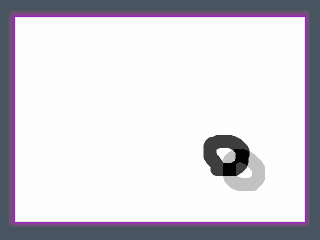
Press F9 or hit the space-bar. The image you'd drawn earlier will be faded out; you’ll also notice that a new layer has been added to the Layers window but the main window will continue showing one layer – that is normal, onion-skinning works that way.

Now, draw the object in a slightly different location, using the faded image as a reference:
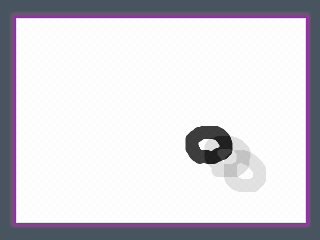
Press F9 again and draw the object at the next location using the faded images as references. At this point, the preview window will start animating the frames that have been defined thus far.
Repeat the process until you've drawn all the frames for the animation. Set the frame delays using the set global frame delay menu option under the animation menu. Here’s the final animation:

Manual Animation
Although the animation composer can generate frames for you, you don’t have to use it. You can as well make the frames yourself then specify how they should be animated by setting the image mode to animation then using the frame delay and z-order.