This tutorial will show you how you can use the image stacking features of Chasys Draw IES to create professional-looking
photographs using inexpensive camera equipment (or even professional equipment). You'll be shown how to take multiple photos of a scene and how to combine them to
create high quality photos with reduced noise, enhanced dynamic range, enhanced resolution, etc.
This is an old tutorial that was done before some advanced tools were added to Chasys Draw IES. As a result, the approach taken here might not be the easiest or most ideal way of doing things with a modern version of Chasys Draw IES.
Before you begin...
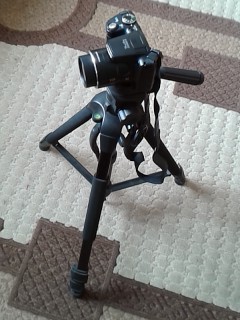
Before we can start stacking images, you need images to stack. Let’s start with the simplest stack you can do, which is an image averaging stack. For this kind of stack, all you need are multiple photos of the scene taken with the camera held steady. This can be done by using the “burst” or “continuous shot” mode of your camera. A camera tripod can be useful for keeping the camera steady as you take the shots:
If you don’t have a tripod, you can keep the camera relatively stable by using one of the following tricks:
Rest the camera on a flat surface and use the timer feature to take the shots. The flat surface will keep the camera steady and the use of the timer means that you won't have to press the shutter button, which can shake the camera noticeably.
Lean against a tree or a wall with the hand holding the camera resting against it and hold your breath while taking the shots. The wall/tree will keep that hand steady, which in turn will keep the camera steady.
The end result you want is 4 to 16 shots of the same exact scene to feed into Chasys Draw IES for stacking.
Aligning the Images
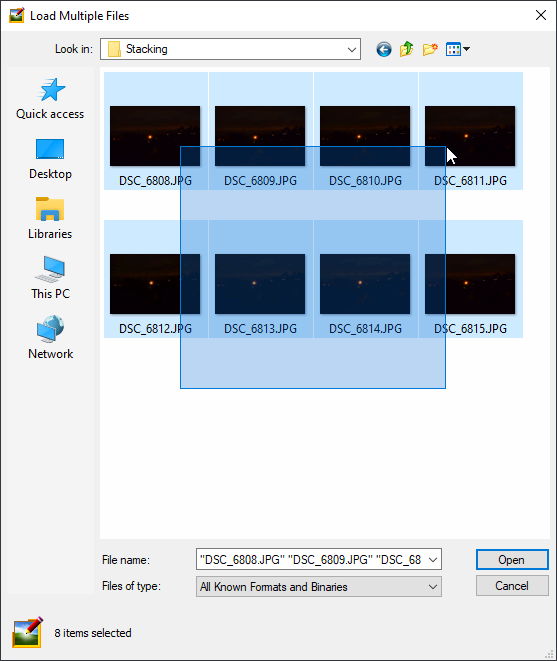
To average the images, start Chasys Draw IES and go to the menu, then select File>>Open Multiple. Select all the images then click Open. Chasys Draw IES will load all the images into the workspace. The New Project dialog has a shortcut for this process, but we won't be using that for this tutorial exercise.
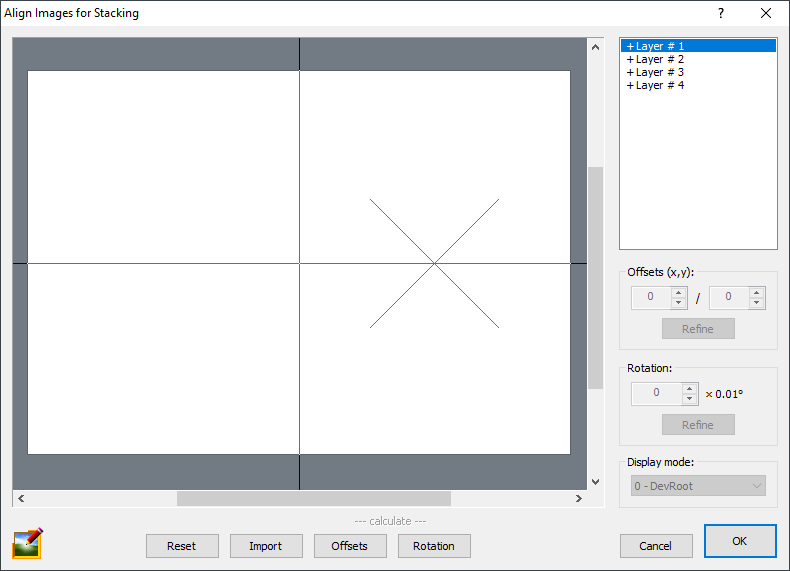
Before the images can be averaged, you need to align them so that features in the images line up at the same pixel coordinates. This is called image alignment or image registration. To align the images, go to the menu then select Processes >> Align Images for Stacking. Chasys Draw IES will display a dialog box where you can specify offsets and angles to align the images:
Although you can align images manually, Chasys Draw IES can automatically detect offsets and angles and align them automatically for you. To do that, click a point in the image to set it as a reference, then click the Offsets button. Although Chasys Draw IES usually gets it right, it’s generally a good idea to scroll though all the previews and make adjustments where necessary. If the images have some degree of tilt between them, click the Rotation button to estimate the angles. Repeat as required, or make manual adjustments if necessary. Once everything is aligned properly, click OK to apply.
Averaging the Images
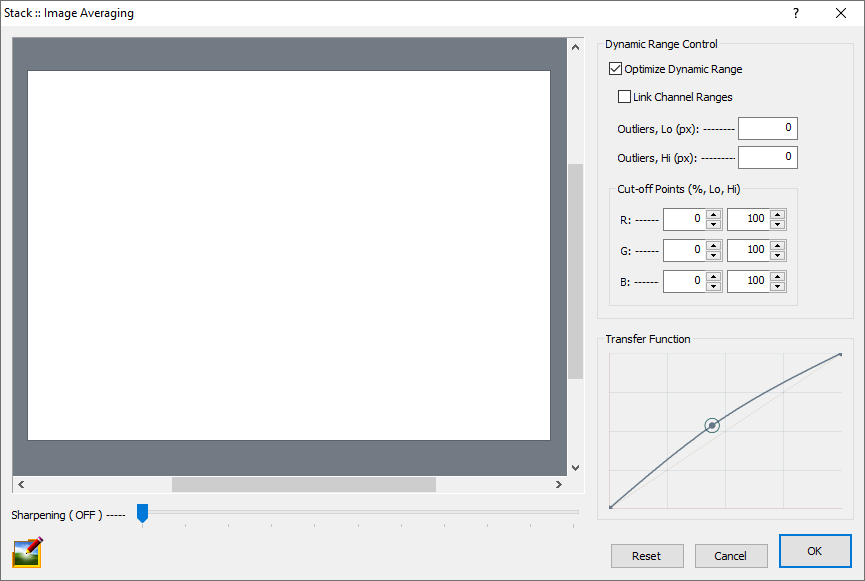
With the images properly aligned, we can now stack them to get a high-quality photo. On the menu, select Processes >> Stack :: Image Averaging. Chasys Draw IES will display a dialog box where you can examine a preview of the stacked image and set various parameters:
Image Averaging is a powerful noise-reduction technique that has the power to remove noise while simultaneously enhancing detail, and is very commonly used in high-end astrophotography and other types of low-light and night photography. Unlike other noise reduction techniques, Image Averaging actually increases the signal to noise ratio (SNR) of your image, as opposed to "hiding" noise by selectively removing pixels or filtering high-frequency image components.
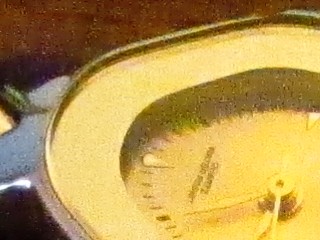
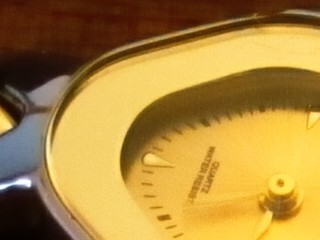
When used for noise reduction, Image Averaging works on the assumption that the noise in your image is truly random, which is true for most sources of noise in digital photography. This way, random fluctuations above and below actual image data will gradually even out as one averages more and more images. If you were to take several shots of a wrist-watch using a steady camera with identical settings and under identical but non-ideal conditions, you would obtain images similar to the one shown on the left below (100% crop of larger image). Averaging them gives you the image on the right:
=
As you can see, most of the noise has been averaged out resulting in a much cleaner image.