Layer-based Design Tutorial
Introduction to Layer-based Design
This tutorial exercise walks you through creating a simple design using layers. It is assumed that you are conversant with the concept of layers. If not, please read the section on Introduction to Layers first.
Task description
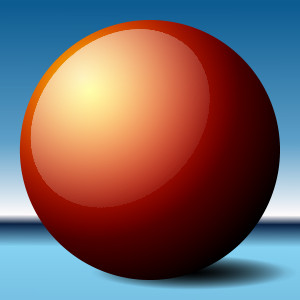
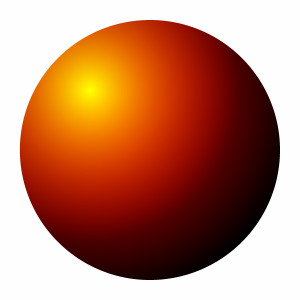
This is what we want to draw. Looks complicated, huh? don’t worry, it’s actually easier than it looks. Just follow the instructions and you’ll see.
Step 1 : The background and ball layer
Select new image from the menu and create a 300 x 300 pixel graphic. Select new layer and add a new layer of the same dimensions.
Set the new layer’s background to transparent and black.
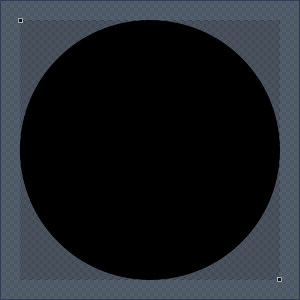
Select this new layer and draw a black circle on it using the Shape tool ![]() as shown below.
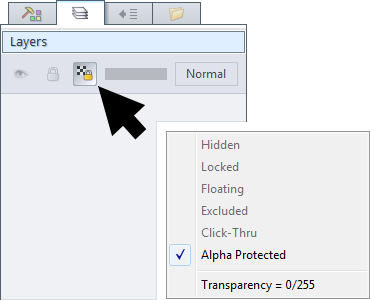
From the layers panel, set this layer to Alpha Protected.
This ensures that any drawing done to this layer does not affect the transparency; so it will always remain round.
as shown below.
From the layers panel, set this layer to Alpha Protected.
This ensures that any drawing done to this layer does not affect the transparency; so it will always remain round.
 |
 |
Step 2 : The gradients
Using the GT Shape tool
![]() in ellipse mode, with color 1 as red, color 2 as black and both alpha 1 and 2 set to zero,
draw a gradient on the second layer, staring near the upper-left and ending past the lower-right edge:
in ellipse mode, with color 1 as red, color 2 as black and both alpha 1 and 2 set to zero,
draw a gradient on the second layer, staring near the upper-left and ending past the lower-right edge:
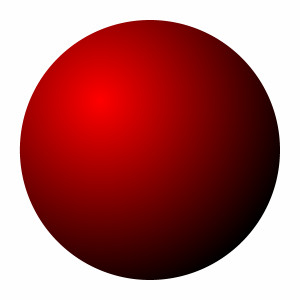
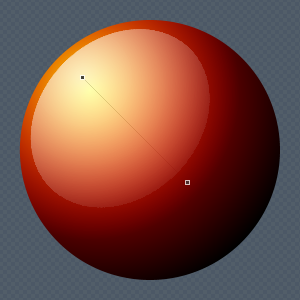
Set color1 to yellow and color 2 to red. Set alpha 1 to zero and alpha 2 to 255. Draw another gradient on top of the first one, pulling down till the surface looks even:
Step 3 : The reflection
Add another layer, 300 x 300, with a white transparent background. Using the shape tool, draw a white ellipse on the new layer.
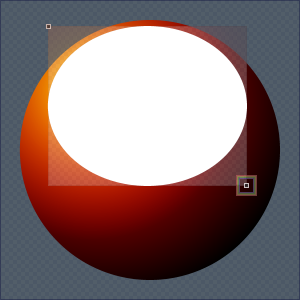
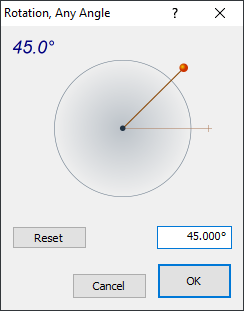
Now, we need to rotate this ellipse. Using the transforms menu, select rotate/arbitrary angle. Rotate the layer anti-clockwise by about 45°. Position appropriately after rotation.
 |
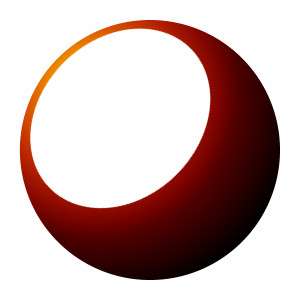 |
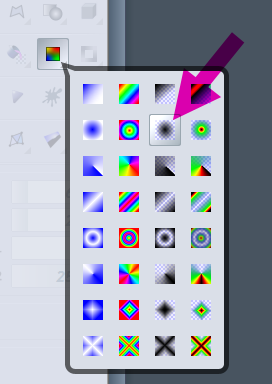
Now, we are going to use one of the newer tools, in this case the elliptical transparency gradient option of the
Gradient Fill tool![]() . Select this tool.
Set alpha 1 to about 64 and alpha 2 to 255. Apply as shown. Adjust to taste.
. Select this tool.
Set alpha 1 to about 64 and alpha 2 to 255. Apply as shown. Adjust to taste.
 |
 |
Step 4 : Final touches
Since we left the background layer untouched and below everything else, we can fidget with it as we wish.
You can decorate it using the gradient tools, for example.
I used a custom gradient with the Gradient Fill ![]() tool for the background,
and two GT Shape
tool for the background,
and two GT Shape ![]() ellipses for the shadows (both colors set to black, alpha set to 0 and 255).
ellipses for the shadows (both colors set to black, alpha set to 0 and 255).
Done! As you can see, that wasn’t so tough! See how easy it is to create stuff when you use layers appropriately?