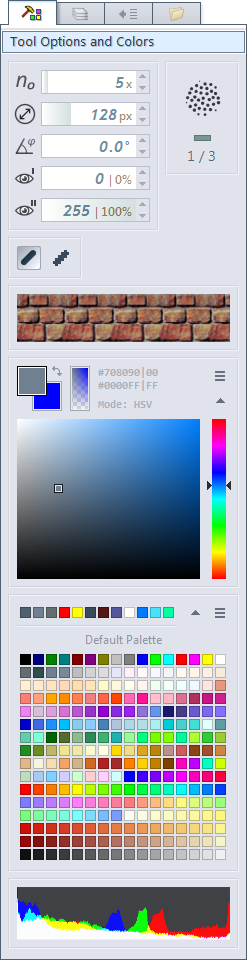
This is the Tool Options and Colors tab; it is where you set various parameters and colors related to the operations of the various tools available in the Toolbox and whose detailed operations are covered under Tools. The tab is divided into various regions that are shown or hidden depending on which tool you are using and what it needs.
The first region contains the tool parameters. These are the basic tool configurations, such as the width of a brush tip. The table below lists the various parameters that are available:
Label
Parameter Description
Order: For example, the number of sides for a shape, for example, a hexagon is a polygon of order 6 (six sides) and a 5-pointed star is a star-polygon of order 5 (five points).
Width: For example, the width of the tool-tip; or the width of a line. The value specifies the number of pixels.
Level or Intensity: For example, how strongly the eraser erases pixels.
Angle: For example, a star may be drawn perfectly upright or slanted at an angle.
Alpha #1: The first transparency value, for example the transparency of the border of a filled shape.
Alpha #2: The second transparency value, for example the transparency of the interior of a filled shape.
To the right of the parameters is the brush tip. Chasys Draw IES supports custom brushes, allowing your tools to have tips that mimic real-world tools or that have different or even animated shapes. This is covered in detail in the Brushes section. The brush tip shows the tip-shape for the active brush and displays basic information about it. Left-clicking it brings up the custom brush selection window. Right-clicking it brings up a menu that can be used for managing the brush. The green LED shows whether or not the current tool support custom brush-tips.
Below the parameters region, some tools may show additional options in the form of buttons. These extra options are outlined below:
Extra Option
Option Description
Brush-tip Mode – These options control the shape of the “brush-tip” of the selected tool when there’s no custom brush.
This option is applicable to brush-like tools such as Brush, Eraser,
Cloning Brush, Pattern Brush, etc.
Anti-alising Mode – These options control whether or not the current tool with apply anti-aliasing to the edges of what it draws.
This option is applicable to geometrical tools such as Line, Curve,
Block, Shape, etc.
Display Options – These options control how the output of current tool is displayed. This option is applicable to transformation tools
such as Projection.
Restrict Modes – These options dictate the restrictions applied to the controls of current tool. These options are applicable to
framing tools such as Crop and Resize, and composition tools such as
Hand. The last two restrict modes have shortcut keys: X for “X-only”, Y for “Y-only” and Z
for “locking”.
Animate Modes – These options control the functioning of the Animate tool, dictating how it
creates new key-times and the properties it assigns to them.
Linear RGB Mapping – This option enables linear RGB mapping, which means that the operation will be performed by first converting
all colors to Linear RGB, working on them, then converting the results back to sRGB.
This leads to better color rendering for hue gradients when using the Gradient Fill tool.
Erase Source Pixels – This option enables “cut” functionality when selecting pixels, which means that selected pixels
will be deleted from the source image and will therefore leave a “hole” in that location.
This allow the Gradient Fill tool to mimic the behaviour of a traditional pixel selection tool in terms of
moving selected pixels.
Blend Mode – This option is used for tools that accept a blending-mode dictating how
the output of the tool should interact with the existing pixels in the image.
This greatly increases the scope of what is achievable using tools such as the Cloning Brush.
Next is the current texture. Some tools require a pattern specification; such patterns are provided by the textures, of which you can have several in one image. This region shows the selected texture if any. Find out more about textures by reading the Textures section. If there is a mask object in use, it will be displayed here as well. The associated menu for either object can be displayed by right-clicking them.
Next, we have the current colors. Transparency is a very central concept in Chasys Draw IES, so this section displays the two selected colors (foreground and background, christened colors 1 and 2), as well as the two selected alphas (transparency values). Additionally, the color values are shown is hexadecimal format. A menu button is provided; this opens a pop-up menu with more options. There’s a tiny arrow between the boxes; clicking this will swap the colors. Clicking the rectangle showing the transparency gradient will swap the alphas.
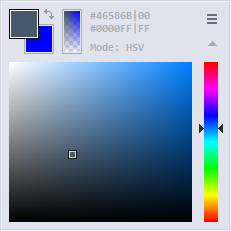
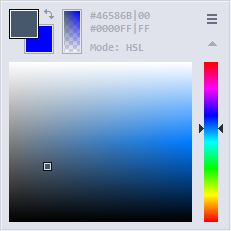
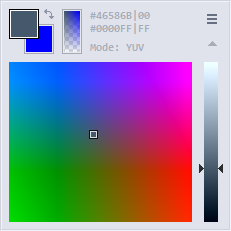
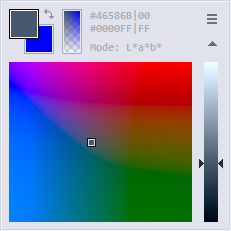
A color picker is provided; this can operate in several different modes, including HSV, HSL, YUV, RGB and CMYK, as shown below. The color picker sets the color that is currently highlighted (either color 1 or color 2); a bold box is shown around this color when the mouse pointer hovers over the current colors. Click either of the large color boxes to select that color.
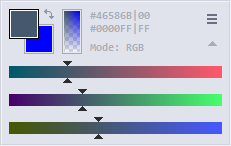
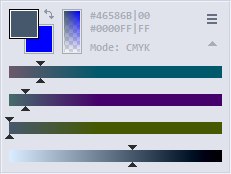
For the RGB and CMYK options, each color channel has a separate slider that you can either click or hold and drag.
The background colors of the sliders change to reflect how the generated color will change if you move them.
The other options use a box-and-slider setup where two channels are controlled by the box and the remaining channel is controlled by the slider; this is a common color picker design that you may have encountered before.
You can collapse or hide the picker section by clicking the provided arrow. When you hide a section, the other sections resize to take advantage of the extra space. For each mode, you can enter the channel values manually by clicking the aforementioned menu button and selecting Edit Manually from the pop-up menu.
Next, you have the swatches section. This section is split into two parts; the top part shows the most recently used colors. These are synchronized between all running instances of Chasys Draw IES Artist, so colors you select in one instance will be reflected in the others. The bottom part is collapsible and shows the colors from the current color palette. A menu button is provided; this provides several swatch options including loading custom swatches from a palette file and saving the current swatches to a new palette file. Chasys Draw IES supports many kinds of palette files, including GIMP palettes, JASC palettes, Adobe Photoshop palettes,
palettized BMP and many more.
When you open an image file that contains a palette (also known as a color map), the entries in that palette may be populated into the swatches. This is intended to make it easier to work with such images. The same thing may happen when you activate a layer that contains a palette attachment. You can prevent this from happening by locking the palette using the Lock Swatches option under pop-up menu shown by the menu button.
Swatches can be subjected to color proofing; this is available via the menu button. Swatches can also be collapsed/hidden to create more room.
The last section is the color histogram; this shows the color histogram (color distribution) of either the whole image or the selected layer. You can switch between the two modes by clicking it with the left mouse button. Right-clicking the histogram opens up a larger histogram window, you can use this if you need to examine the histogram more closely.
There’s a lot of functionality packed into the menus indicated by the three-bar symbols. Also notice the arrows for expanding and collapsing various sections.